Showing posts with label food. Show all posts

June 22, 2016

A History of Royal Food and Feasting: Free Online Class!

This week the free online course "A History of Royal Food and Feasting" goes live. It is being hosted by the University of Reading in southeast England and focuses on the foodways of 5 key monarchs including Henry VIII and George III.


The class starts this week so don't miss out! I'm a huge proponent for MOOCs, alternative, and free education and this class is top quality. It is hosted on the FutureLearn website which offers many very interesting courses. I urge everyone to check them out.

October 29, 2015

18th Century Crab Apple Verjuice Recipe

Verjuice is acidic juice typically made from unripe grapes or crab apples. It gained popularity in the Middle Ages and was popular throughout the 1700s as a sauce, glaze or pickle.| Easy recipe | World Turn'd Upside Down

Verjuice (or verjus) is acidic juice typically made from unripe grapes or crab apples. It gained popularity in the Middle Ages and was popular throughout the 1700s as a sauce, glaze or pickle. The flavor is milder than vinegar and is good when used in the place of lemon juice in recipes. The name comes from the French "verjus" or "green juice" and both terms are used throughout the 18th century. 

This verjuice recipe can be made with crab apples or unripe grapes. Crab apples are much easier to come by in Pennsylvania. The result is an amber colored liquid instead of the "green juice" you would get from grapes but is delicious nonetheless. When I was younger, I was told to pick crab apples when they were black and the crows started to eat them.  The farther along your crab apples are, the easier they will be to mash and remove the stems. The recipe says to pick the crab apples in October although many of our trees were finished long before. 

Ingredients:

-Crab Apples (a pound of crab apples will yield about 1 cup of juice.)
-Sterilized Bottles 

Instructions:

Make sure your bottles are sterilized. Let your crab apples soak in a vinegar water solution to clean them before you remove the stems. You do not have to peel the crab apples. If you have a wine press or juicer, juice the crab apples. (I do not have a wine press or anything similar, so I minced my crab apples in a food processor. I then put the minced crab apples in a cloth and squeezed out the juice by hand.) Bottle your juice and cover with a cloth or cork loosely. Leave room at the top for the juice to ferment.  Keep in a dark cupboard.

Verjuice is used both fresh and fermented. Most 18th century recipes note that it is ready to use 2 weeks to a month after it is bottled. Some recipes call for distilling after juicing but it is not necessary. 

Crab apple verjus verjuice recipe 1700s

Colonial recipe Crab apple Verjuice reenacting
 
Colonial recipe crab apple verjuice

I was lucky enough to be given some crab apple vinegar by a friend so I've been having fun tasting them both every few days to see how they differ. When I first read about crab apple verjuice I was unsure of how the process differed from making crab apple vinegar. When making vinegar you ferment the skins, fruits and juice together for verjuice it is just the juice. The verjuice also appears darker in color.

Disclaimer: Fermenting, bottling and canning all require safety food procedures. Make sure you are up to date before attempting to make verjuice. As with all historical recipes, try at your own risk.  

May 26, 2014

18th Century Altoids: A Recipe from the 1790s and Beyond

18th Century Altoids Lozenges Recipe
The current day mints that we call Altoids have a long history. The recipe dates back at least to the 1780s, and were called peppermint lozenges. Peppermint lozenges were originally thought to cure upset stomachs. They were created as a convenient substitution for peppermint water which was used previously.     

By the early 1800s, doctors and chemists attest to the popularity of lozenges and mention the additional flavors of ginger and horehound.[1] By the 1860s, authors mention many additives such as liquorish, anise, black currant, cayenne, rose, lavender, rhubarb as well as others, including quinine.[2] 

They became popular as both medicine and candy throughout the 19th and 20th centuries. In modern times, there are few candies that have stuck with this simple recipe. Altoids is the most prominent company making them today. Their history with the recipe dates back to one of the early big producers in the 1780s, Smith and Co. who dubbed their brand of peppermint lozenges Altoids, but they weren't sold in the United States until the 20th century. The recipe remains very similar today.  [3]
 
 
1700s Altoids Lozenge Recipe

Peppermint Lozenges


Ingredients:

- 16 oz Powdered Sugar + more for dusting
- 2 oz Gum Arabic, Gum Tragacanth or Tylose (more common in modern baking)
-Peppermint Oil
-Food Coloring

Instructions:

Mix sugar, gum and water in a bowl. If making one flavor, about 15 or so drops of oil and coloring can be added during the mixing process. If making multiple flavors, make the dough first and knead in the colors and flavors later. Let sit for 15 minutes. Roll out on a powdered sugar or cornstarched surface and cut shapes with a small cutter or large straw.  
Sprinkle your hands, workspace and rolling pin with powdered sugar or cornstarch.

***Alternatively, Modern gum paste can be bought and used as it has changed very little in recipe, most are a mixture of sugar and some type of gum. Many modern recipes for gum paste are also available online.


[1] Chamberlaine, W.. "Mr. Chamberlaine, on the Ammendments of the Medicine Act." In The Medical and Physical Journal, . London: Richard Phillips, 1803.
[2] Weatherley, Henry. A treatise on the art of boiling sugar, crystallizing, lozenge-making, comfits, gum goods, and
 other processes for confectionery, etc.: in which are explained, in an easy and familiar manner, the various methods of manufacturing every description of raw and refined sugar goods, as sold by the trade, confectioners, and others. Philadelphia: H.C. Baird, 1865.
[3] Altoids® (Wrigley.com) http://www.wrigley.com/global/brands/altoids.aspx

October 22, 2013

Homemade Apple Cider Recipe

Colonial Recipes
This weekend I finally got to use the cider press at work. It has been out of commission for a while and I hadn't seen it in action.

I love pretty much everything about fall. I love all of the fun activities that come with fall. But after making cider, I'm starting to believe it might just be the quintessential fall activity. Or at least should be included among the classics, such as watching the leaves change colors and enjoying bonfires at night.

Making cider sounds difficult but is actually surprisingly easy and the smell is amazing. With a cider press, all you have to do is grind up the apples then press them and you're done. At home you can do it the same way or you can cook the apples first to make them easier to press.  

Colonial Recipes
Colonial Recipes
Colonial Recipes
Revolutionary War Reenactor

Homemade Apple Cider

Ingredients:

- 10-15 Apples of mixed sorts
- 3 Cinnamon sticks
- 1 teaspoon whole Cloves
- 1 Nutmeg, whole
- 1 Orange
-  1/2- 3/4 Cups of Brown Sugar
- Water

Instructions:

Wash your apples and orange then core and cut them into quarters. If you are not planning on using the pulp for anything, you do not have to worry about removing the core or seeds. Put your apple chunks into a large pot and add enough water to cover the apples. Wrap your Cinnamon, Cloves and Nutmeg in cheese cloth and add to the pot. Add the sugar to taste. Bring the contents to a boil then reduce heat and let simmer for an hour or more, covered.

Let the pulp cool. Once cool strain it through a doubled piece of cheesecloth over a bowl. Squeeze the pulp to make sure you get out all of the juice. If you want you can strain the juice a second time.    

The pulp does not look appetizing but can be used in apple bread or apple muffins. You can also make pectin for jelly from it.


June 4, 2013

10 Tips to Take Better Food Photos with the Camera You Have


It's no secret that I like to take photos of food. I think part of having an interest about how other people live also have an interest in how other people eat. There is a whole art to food styling and propping, which I won't get into as I am really writing this for people who just want to take better photos of what they cook. I am actually against too much food styling as many techniques you see in magazines and on TV actually make the food inedible.  

I made sure to not use my good camera because I wanted to give tips on how to get the most out of the camera you have. Some of these photos were shot with my phone and some were shot with my micro 4/3 camera. 


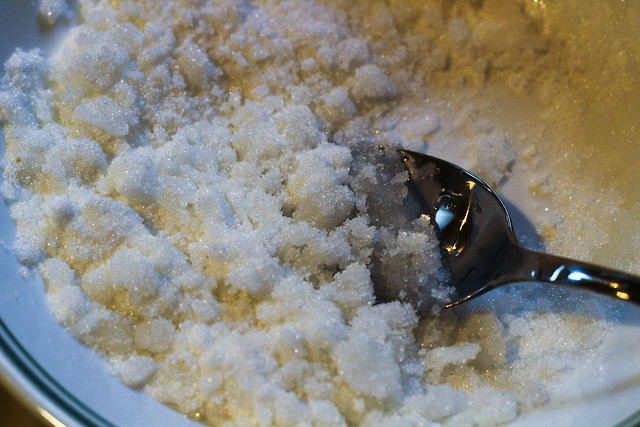
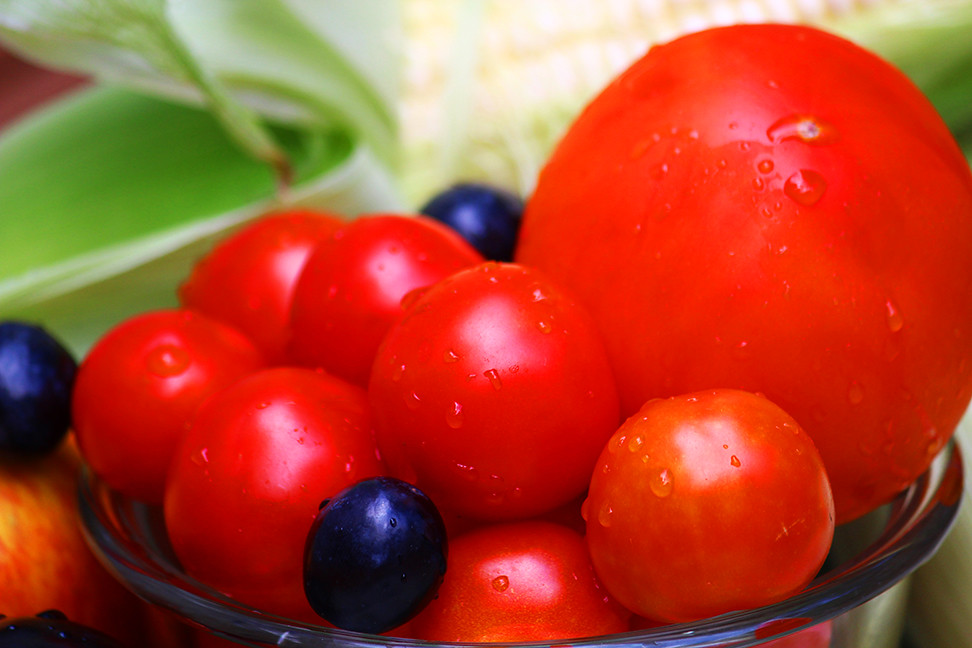
1. Start with good looking food. This sounds easy enough but take an extra minute to make sure you use the best looking parts of your meal to photograph.  Some foods get squishy looking or discolored through cooking so look around for the most appetizing pieces. Some people plan ahead and under-cook things that wilt like veggies so that they keep their fresh appearance.

2. Stage your set. If you have a couple seconds free during cooking, plan your shot. Will your food look better on a particular color plate? Do you want to use some props such as forks, drinks, napkins or placemats? Don't overdo it on the props, usually simpler is better. Make sure all of this is set out and placed how you want it before the food is done cooking. It's easier to use a smaller plate with smaller portions than you normally would.

3. Shoot right away. Most food will look less appetizing as each minute passes so try to take your shot as quickly as possible.  

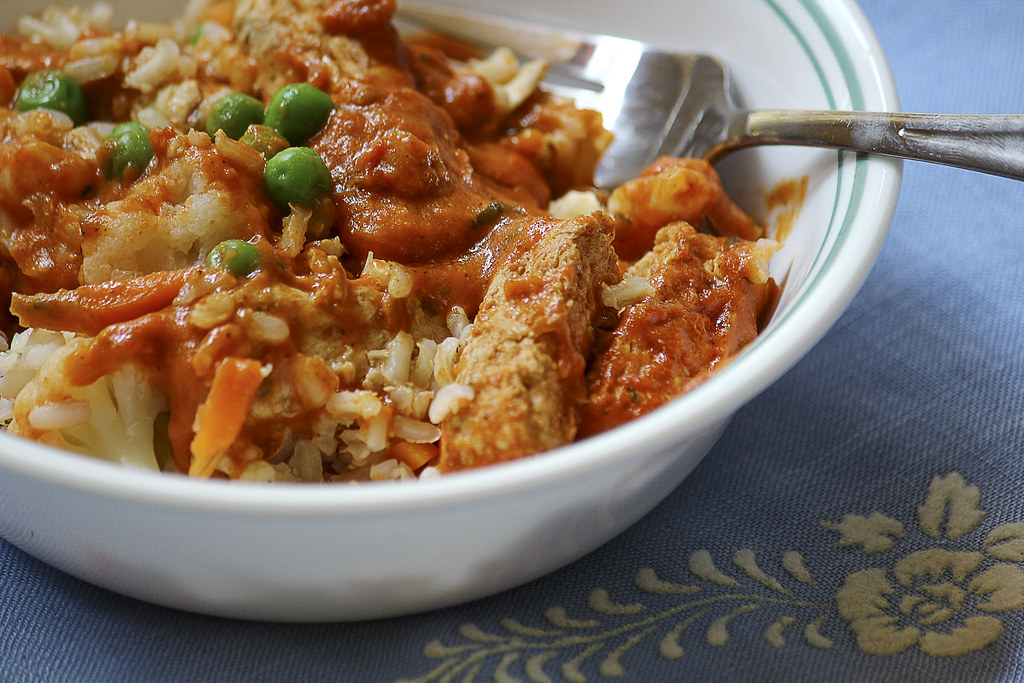
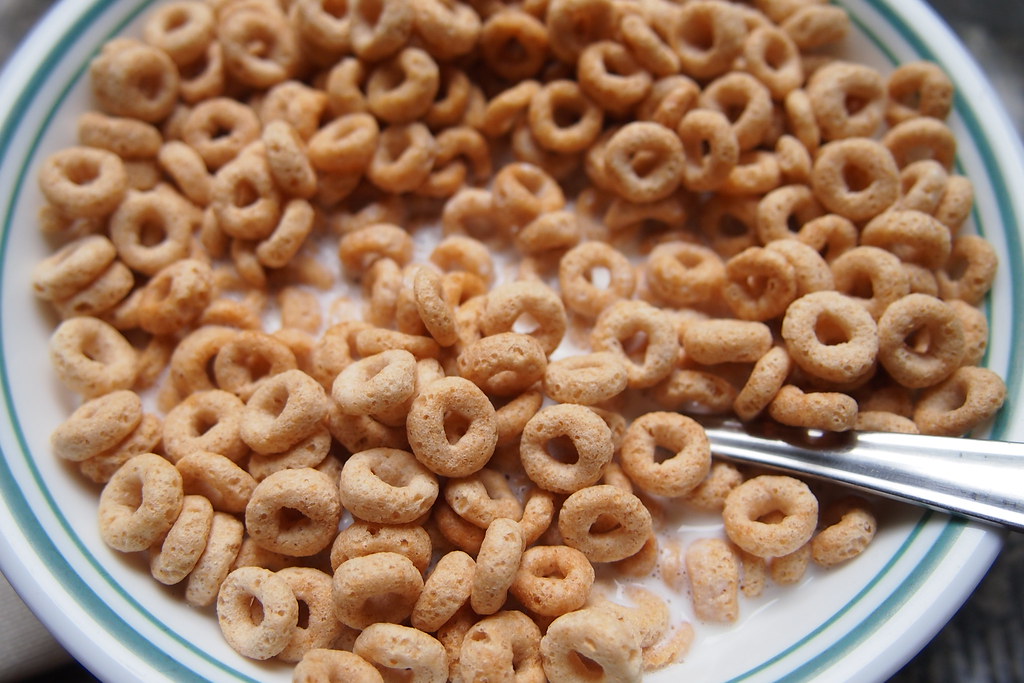
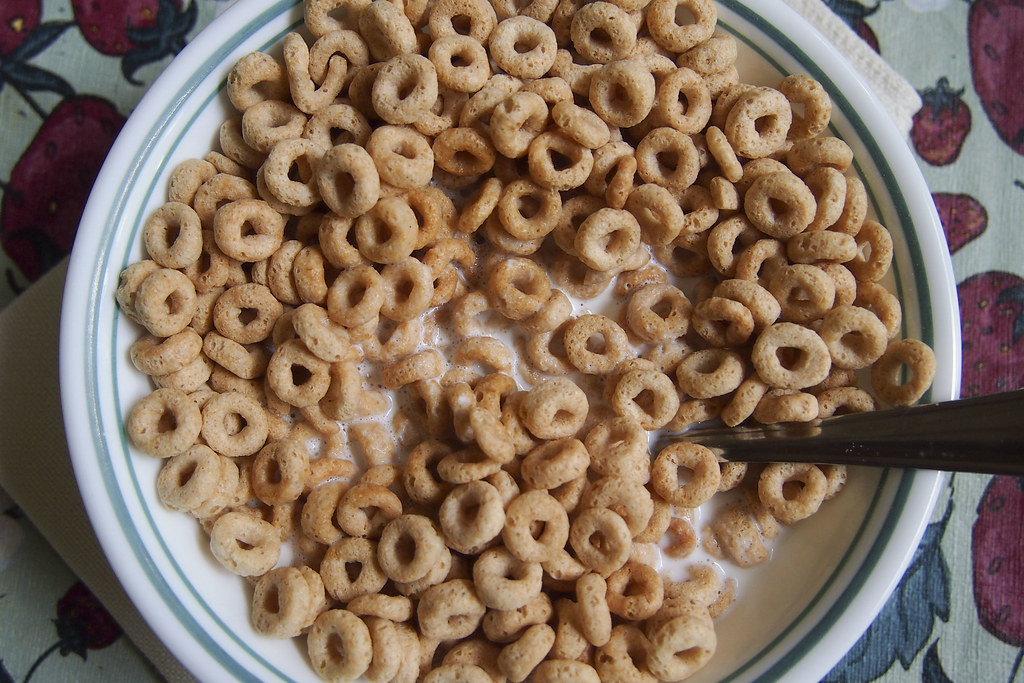
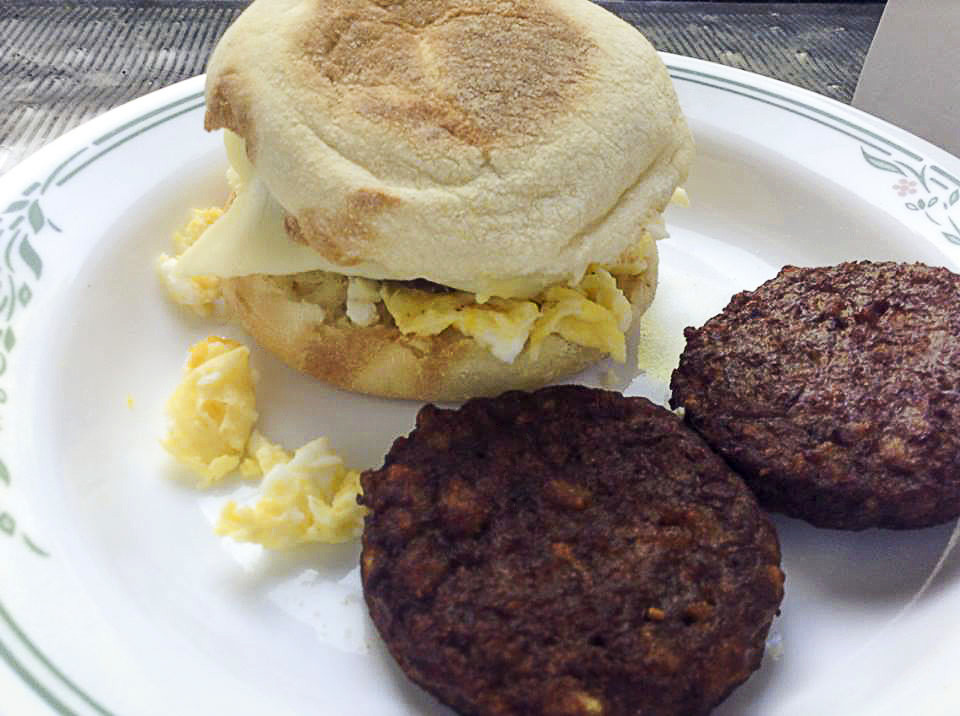
4. Use low angles. Food typically looks best when shot at lower camera angles. This isn't always the case, as some food looks good shot from straight above, but most food looks best using a 3/4 angle or lower to the plate.

3/4 view
Full on can still be appetizing, but is generally not as inviting.

5. Use natural light. The light in our houses tend to give a cast to food that can make it look unappetizing. Try to photograph food using natural light from a window. Place the light source behind the food or to the side.


6. Use reflectors to bounce light back on the food. You can use something as simple as folded sheets of paper or some crumbled up aluminum foil. Place them around the food to brighten up shadows that the food casts on the plate and other parts of the food. Just make sure you don't get them in your photos, unless they don't distract from the food. 


7. Use macro. If your camera has a food setting, use the food setting, but if it doesn't, use the macro setting. The macro setting is typically denoted with a little flower. These settings will show more detail than the regular settings.

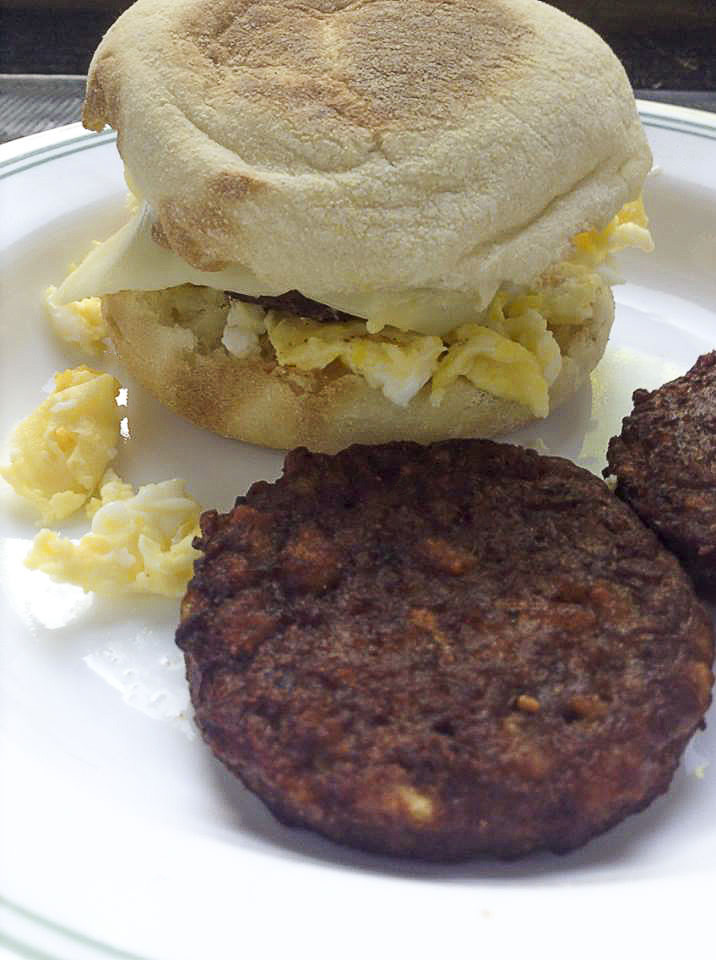
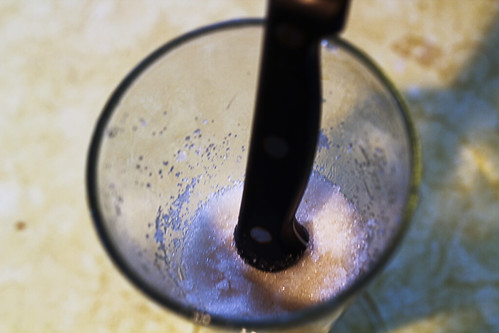
8. Shoot close. Some foods don't look look good, no matter what. In these cases shoot in very close. It doesn't solve the problem but it will make your food look better. 

Not even my good camera could make this look appetizing from far away.
9. Take multiple shots. Sometimes we think something looks good on one side, until we move the camera and find out that it really looked better from a different angle. Make it a habit to take a couple of shorts from different angles. You might like them better when you see them on a full screen. 

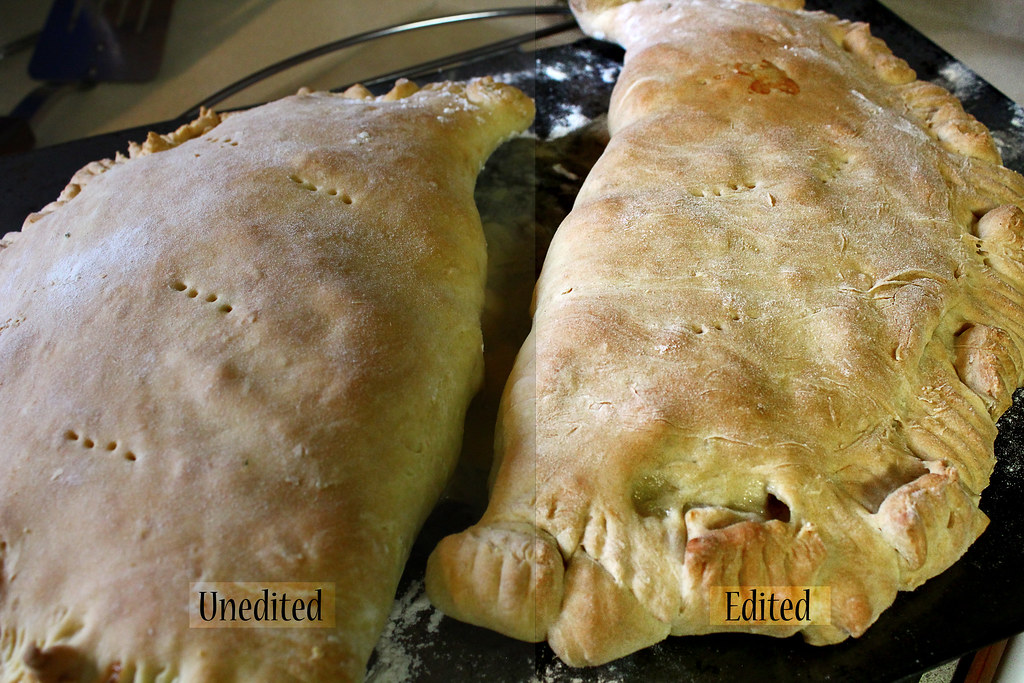
10. Edit. There are plenty of free editing programs out there, like Pixlr, that can help make your food look its best. I only did editing on the Masala shot, but editing can make a big difference. A lot of time photos just need a little bump in contrast.

 
So there's 10 tips. Most consumer cameras take photos with good contrast and a good amount of saturation so that food generally looks good, right when you take the shot.  

The quality of the photos taken with my phone are obviously not the best, but a reasonably good photo can still be had with the worst of cameras. I assume most people have even a slightly better camera than the one that comes with your phone. Sometimes the phone is all you have, so remember to make the most of it.

May 3, 2013

How to Make a Colonial Era Sugar Cone or Sugar Loaf

During the Colonial period, refined white sugar was commercially available in the shape of cones, or loafs because of the processing technique used to refine the sugar. Sugar during this period came primarily from the Caribbean and was typically the product of slave labor.

In simplistic terms raw sugar from sugar cane was boiled and filtered a number of times, then poured into cone-shaped molds. Once in the mold, sugar water or other solution was poured over the sugar to remove the excess cane molasses. The sugar loaves were then removed from the molds and dried. Many loaves during the period were wrapped in blue paper for shipping. 


Fine sugar came in smaller cones and cheaper sugar came in bigger cones as lower quality sugar was more difficult to crystallize and worked better in bigger molds.     


Sugar Cone Prop Recipe

Things you'll need:

- Sugar (white)
- Mold or glass
- Cooking Spray
- Water


Things you will need.
Spray mold with cooking spray. Add water to sugar. There is no real formula for how much water should be added. Just add a few teaspoons at a time until your sugar sticks to itself but not so much that it is "slushy." It should have the consistency of brown sugar. Add sugar slowly into the mold, being sure to pack it down every few spoonfuls. Let sugar dry in mold for a few days. Tap out the sugar and feel for any softness, if still soft, let dry out of the mold for another day. 


Sugar "slush."

Pack it down.

Let it dry.

Enjoy your sugar! Sugar cones had to be broken with sugar nippers before use. (Pictured in top image.)

I've had some questions about brown sugar cones, as many Mexican grocery stores still sell brown sugar cones. I have not come across evidence of brown sugar cones during this period as the cone shape came from the refining process. If anyone has evidence to the contrary, I would love to know of it. As of right now, brown sugar cones don't seem to belong to the 13 colonies during the Colonial period. 

January 3, 2013

The Fruits of Your Labor

It's January and, as always, I've just received my gardening catalogs in the mail waiting to tempt me with their bright colors and juicy fruits. It always works. I'm not even thinking about a garden because of the frigid temperatures and the frozen ground but once those catalogs come, I'm planning the gardens of Versailles.

I've always had a very small garden. I am very limited in what I can grow so I normally have two small raised beds with tomatoes, green peppers, green onion, etc. and one raised bed of experimental vegetables. Last year, my experimental vegetables were leeks and onions. The leeks grew nice, but if I was to do it again, I would buy plants instead of starting from seeds. The leeks take two years to reach a good cooking size. The onions didn't grow as planned. They sprouted a lot of leaves but stayed tiny bulbs. I don't know what I did wrong, but probably won't try again until I get more space.

This year, I think I'm doing away with the experimental bed and just planting herbs like I've always threatened. No, really this time. :) Then again, half of the fun of gardening might be those plants that are planted just for fun.


Did you know that I was afraid to eat my garden produce for a long time? Yes, I know that's crazy. I used to think that I might have done something wrong and it would kill everyone. I thought that the produce you get at the grocery store must be grown in tested dirt and cleaned a special way to make it safe. :) As much as I laugh about that now, I'm not surprised that a lot of people think the way I used to. Maybe it's the fact that you see dirt on the vegetables that you pick yourself and at the store it looks squeaky clean. However, I also feel that society as a whole tends to perpetrate a myth that grocery store produce is somehow safer than homegrown food.

It also doesn't help that there have been a lot of ridiculous government incidents recently involving homegrown/cooked food, raw milk, privately raised meat etc. Those news articles about people having to pay huge fines for growing their own food are scary but what can be more natural than growing what you eat? You see it from seed to plate. My only limitation is my tiny plot.

Tips for people with tiny gardens:

1. Practice cooking vegetables. This sounds silly but once you have a lot, you'll have to use them in everything. For the time you don't have a big garden, collect recipes that include a lot of the produce you wish to grow someday. 

2. Grow what is cost effective or what is fun. If you aren't worried about cost, you can grow what is fun. If you have limited means grow things that grow easy in your area and are cost effective. Plants like lettuce, green peppers, tomatoes can typically be grown with little effort and are a lot cheaper than they cost in the store. I've never had luck with veggies like carrots so they've always been cheaper for me to buy. 

3. Think creatively about what can be used for planting. I've long had a deck garden of tomato plants in various plastic tubs. Herb plants can be grown in small pots in the kitchen. Plants can be grown in hanging pots. I've even seen some creative "vertical gardens," such as this one made in a shoe organizer. I'm not sure I'd grow tomatoes in there but that would be perfect for keeping herbs away from small critters. 

4. Borrow space. See if your local 4H or park has a garden club or gardening space for rent. If you are really lucky, you may even be able to borrow some land from a friend. 

5. If allowed in your area, consider edible landscaping. This would be my goal, if I had a yard of my own. I've always wanted fruit trees. A house nearby does a little bit of edible landscaping, their driveway is lined by rows of veggies, from smallest to tallest having root veggies in the front and corn in the back.     

Is anyone else starting the garden plans already? I am even more intensely inspired because I read an account of a woman who recreated the historical colonial gardens where I work, back in the 80s. The colonial accounts from women she included were interesting and made gardening seem like the natural way of things.  

May 29, 2010

Rue, an Herb of Days Passed

"There's rosemary, that's for remembrance; pray, love, remember: and there is pansies. that's for thoughts. There's fennel for you, and columbines: there's rue for you; and here's some for me: we may call it herb-grace o' Sundays: O you must wear your rue with a difference. There's a daisy: I would give you some violets, but they withered all when my father died: they say he made a good end..." Ophelia in Hamlet

Common Rue is a small shrub native to Europe. It is a strong, bitter, herb and has been used for culinary and medicinal uses for hundreds of years. In Medieval times it was thought to ward off the plague, witches and lice and was used to treat snakebites. Later it was said to improve eyesight and creativity; it is said that many famous Renaissance artists ate it to improve their skills.Too much rue can poison a person but in the 1600s it was used as an antidote for poison. It was also used to cure arthritis. If you are cut, and touch it, blisters will form. It used to be used sparely in Middle Eastern foods and is currently used in Ethiopian dishes. It currently seen in European gardens as it creates neat hedgerows and is cropped easily.           

I am writing about rue today because, while at the living history farm a few weeks ago, someone handed a bunch of it to us ladies in the kitchen. He told us to hang it to deter mosquitoes.We both smelled it and touched it, wondering what it was and we hung it without a second thought. Later that day, one of our friends said "What is this doing in here where people can touch it?" in a surprised tone. He told us what it was and we ladies looked at each other in fear as we remembered all of the handling and smelling of the rue. None of us were harmed. It is said that some people are more apt to be affected by it than others. It's good to know we are a relatively hardy pack of women.

March 29, 2010

Stinging Nettle: A Plant with 1,000 Uses

"Tender-handed stroke a nettle, And it stings you for your pains; Grasp it like a man of mettle, And it soft as silk remains. 'Tis the same with common natures, Use 'em kindly, they rebel; But, be rough as nutmeg-graters, And the rogues obey you well," - Aaron Hill, 1750
 Spring is finally here, I was helping out at the Colonial living history farm where I work. I was anxious to see how it changed over the winter and to see all of the animals. Along the path up to the farmhouse, we have stinging nettle growing along our split rail fence. They are just springing up, the best time to eat them. At this stage they don't sting because the poison fulled barbs have not developed fully. 
      Stinging Nettle (Urtica dioica), is a plant native to Europe, North America and Asia. It is commonly considered a nuisance, like poison ivy, due to the fact that its leaves have thousands of tiny hollow needles filled with chemicals that will be transferred into your skin if you touch it. It has been used since the Bronze Age to make cloth, green dye, twine, fishing nets, vegetarian rennet (to help make cheese,) and was even eaten as a vegetable. If you boil stinging nettle, it will not sting when you eat it.

      Stinging Nettle was popular in folk medicine and folklore. It is one of the 9 herbs listed in the10th century, Anglo-Saxon 9 Herbs Charm.  Robert Kay Gordon, an English Literature professor and author claimed this poem was "clearly an old heathen thing which ha[d] been subjected to Christian censorship." The poem describes mixing herbs together to create medicine. Perhaps the mixture really worked as Nettles are still used in medicine today, some examples can be seen at the University of Maryland website. A reading of the 9 Herbs Charm can be heard at Anglo Saxon Aloud. According to Irish Tradition, 3 bowls of Nettle Soup, when eaten in the month of May, will prevent rheumatism for the year. A recipe for Irish Nettle Soup can be found at Soup Kitchen Recipes.
     Nettles had been used to make a cheaper form of linen in Medieval and Colonial times.  In the 1850s, Germany used Nettles to make high quality paper and later used nettle fiber during WWI to make military uniforms, the uniforms were made up of 85% nettles due to the cotton shortage.

      If you are among the brave and are considering trying to eat Stinging Nettle, The Bottle Inn, in Marshwood, England hosts a national raw nettle eating contest in which the contestants can numb their tongues with nothing but beer. It sounds painful to me! (Especially when they talk about facial paralysis.)

For those interested in growing their own heirloom Nettles for soups and salads, Local Harvest, sells seed packets. I was so happy to be back on the farm. I was glad to see the animals again, they are getting so big, especially the pigs. I had to clean out the kitchen in the farmhouse but it was worth it to see all of the people I hadn't seen all winter. I guess if I want to try some Nettle, now would be the time to do it. I don't know if I am that brave, just yet. 

Copyright © 2008-2020 Stephanie Ann Farra. All rights reserved.

All materials posted on this site are subject to copyrights owned by Stephanie Ann Farra. Any reproduction, retransmissions, or republication of all or part of any document found on this site is expressly prohibited, unless the author has explicitly granted its prior written consent to so reproduce, retransmit, or republish the material. All other rights reserved.